See? I’m really running NixOS.
flake.nix and set ~/.android/avd/phone.avd/config.ini hw.keyboard = yes to have a good Android emulator experience.Introduction
It was an absolute nightmare but I finally managed to run both Android Mobile and Android TV emulators on NixOS without resorting to using a virtual machine. This blog post was super helpful in my quest. I literally just copied the flake.nix and the Android mobile emulator worked flawlessly.
Prerequisite
Your project is using
flake.nixanddirenv.In your NixOS system configuration, add
kvmto theextraGroups:
  users.users.yourname = {
    isNormalUser = true;
    extraGroups = [ "networkmanager" "wheel" "input" "dialout" "kvm" ];
    uid = 1000;
  };
Reboot and let it take effect.
Android Mobile Emulator
1. Create the flake.nix
{
  description = "Android Mobile Environment";

  inputs = {
    flake-utils.url = "github:numtide/flake-utils";
    nixpkgs.url = "github:NixOS/nixpkgs";
  };

  outputs = { self, nixpkgs, flake-utils }:
    flake-utils.lib.eachSystem [ "x86_64-linux" ] (system:
      let
        pkgs = import nixpkgs {
          inherit system;
          config.allowUnfree = true;
          android_sdk.accept_license = true;
        };
        androidEnv = pkgs.androidenv.override { licenseAccepted = true; };
        androidComposition = androidEnv.composeAndroidPackages {
          cmdLineToolsVersion = "8.0";
          platformToolsVersion = "34.0.4";
          buildToolsVersions = [ "34.0.0" ];
          platformVersions = [ "34" ];
          abiVersions = [ "x86_64" ];
          includeNDK = false;
          includeSystemImages = true;
          systemImageTypes = [ "google_apis" "google_apis_playstore" ];
          includeEmulator = true;
          useGoogleAPIs = true;
          extraLicenses = [
            "android-googletv-license"
            "android-sdk-arm-dbt-license"
            "android-sdk-license"
            "android-sdk-preview-license"
            "google-gdk-license"
            "intel-android-extra-license"
            "intel-android-sysimage-license"
            "mips-android-sysimage-license"
          ];
        };
        androidSdk = androidComposition.androidsdk;
      in {
        devShell = with pkgs;
          mkShell {
            ANDROID_HOME = "${androidSdk}/libexec/android-sdk";
            ANDROID_SDK_ROOT = "${androidSdk}/libexec/android-sdk";
            JAVA_HOME = jdk11.home;
            GRADLE_OPTS =
              "-Dorg.gradle.project.android.aapt2FromMavenOverride=${androidSdk}/libexec/android-sdk/build-tools/34.0.2/aapt2";
            QT_QPA_PLATFORM = "wayland;xcb";
            buildInputs = [ androidSdk qemu_kvm gradle jdk11 ];
            LD_LIBRARY_PATH =
              "${pkgs.lib.makeLibraryPath [ vulkan-loader libGL ]}";
          };
      });
}
Remember to git commit the flake.nix and run direnv allow to allow pulling the resources.
2. Create the emulator
➜ avdmanager create avd --name phone --package 'system-images;android-34;google_apis;x86_64'
[=======================================] 100% Fetch remote repository...
Auto-selecting single ABI x86_64
Do you wish to create a custom hardware profile? [no] no
3. Run the emulator
emulator -avd phone -skin 720x1280 -noaudio -no-snapshot-load -no-snapshot
At this point the emulator should start and operate normally.
4. Fix the D-pad
The D-pad did not work out of the box. Turned out the culprit was the generated config.init. Edit ~/.android/avd/phone.avd/config.ini:
hw.dPad = yes
hw.keyboard = yes
hw.mainKeys = yes
The critical part is changing hw.keyboard from no to yes. The other values should be correct already.
Restart the emulator and the D-pad should work.
Android TV Emulator
1. Create the flake.nix
{
  description = "Android TV Environment";

  inputs = {
    flake-utils.url = "github:numtide/flake-utils";
    nixpkgs.url = "github:NixOS/nixpkgs";
  };

  outputs = { self, nixpkgs, flake-utils }:
    flake-utils.lib.eachSystem [ "x86_64-linux" ] (system:
      let
        pkgs = import nixpkgs {
          inherit system;
          config.allowUnfree = true;
          android_sdk.accept_license = true;
        };
        androidEnv = pkgs.androidenv.override { licenseAccepted = true; };
        androidComposition = androidEnv.composeAndroidPackages {
          cmdLineToolsVersion = "8.0";
          platformToolsVersion = "34.0.4";
          buildToolsVersions = [ "34.0.0" ];
          platformVersions = [ "34" ];
          abiVersions = [ "x86" ];
          includeNDK = false;
          includeSystemImages = true;
          systemImageTypes = [ "android-tv" ];
          includeEmulator = true;
          useGoogleAPIs = true;
          useGoogleTVAddOns = true;
          extraLicenses = [
            "android-googletv-license"
            "android-sdk-arm-dbt-license"
            "android-sdk-license"
            "android-sdk-preview-license"
            "google-gdk-license"
            "intel-android-extra-license"
            "intel-android-sysimage-license"
            "mips-android-sysimage-license"
          ];
        };
        androidSdk = androidComposition.androidsdk;
      in {
        devShell = with pkgs;
          mkShell {
            ANDROID_HOME = "${androidSdk}/libexec/android-sdk";
            ANDROID_SDK_ROOT = "${androidSdk}/libexec/android-sdk";
            JAVA_HOME = jdk11.home;
            GRADLE_OPTS =
              "-Dorg.gradle.project.android.aapt2FromMavenOverride=${androidSdk}/libexec/android-sdk/build-tools/34.0.0/aapt2";
            QT_QPA_PLATFORM = "wayland;xcb";
            buildInputs = [ androidSdk qemu_kvm gradle jdk11 ];
            LD_LIBRARY_PATH =
              "${pkgs.lib.makeLibraryPath [ vulkan-loader libGL ]}";
          };
      });
}
Notes:
- I use
systemImageTypes = [ "android-tv" ];. You can use the following to see what images and architectures are available:
➜ sdkmanager --list | grep "android-tv"
  system-images;android-33;android-tv;arm64-v8a                                   | 5                 | Android TV ARM 64 v8a System Image
  system-images;android-33;android-tv;x86                                         | 5                 | Android TV Intel x86 Atom System Image
  system-images;android-34;android-tv;arm64-v8a                                   | 3                 | Android TV ARM 64 v8a System Image
  system-images;android-34;android-tv;x86                                         | 3                 | Android TV Intel x86 Atom System Image
Let’s say you have to use system-images;android-34;android-tv;arm64-v8a. You have to change the field to abiVersions = [ "arm64-v8a" ]; to reflect the new architecture.
Remember to git commit the flake.nix and run direnv allow to allow pulling the resources.
2. Create the emulator
➜ avdmanager create avd --name android-tv --package 'system-images;android-34;android-tv;x86'
[=======================================] 100% Fetch remote repository...
Auto-selecting single ABI x86
Do you wish to create a custom hardware profile? [no] no
3. Run the emulator
emulator -avd android-tv -skin 1920x1080 -noaudio -no-snapshot-load -no-snapshot
At this point the emulator should start and operate normally.
4. Fix the D-pad
Make sure ~/.android/avd/android-tv.avd/config.ini:
hw.dPad = yes
hw.initialOrientation = landscape
hw.keyboard = yes
hw.mainKeys = yes
The critical is changing hw.keyboard from no to yes. The other values should be correct already.
Tips
1. Debug by deleting the emulator image and start fresh
avdmanager delete avd -n android-tv
2. Use 3-button navigation if D-pad is not working
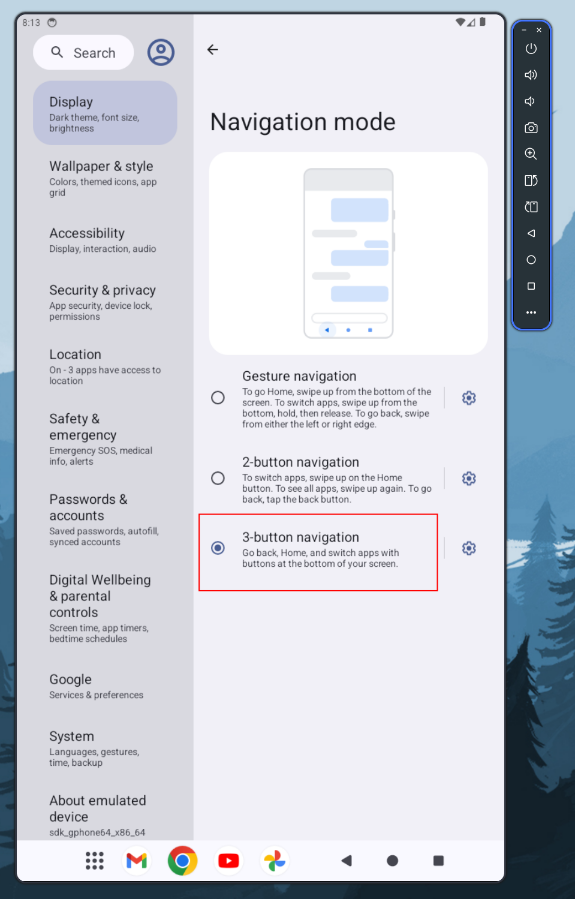
This works for Android mobile but not Android TV.
Alternatives
The magic of Nix: one line home.packages = with pkgs; [ android-studio-full ]; and you’re good to go, right? Not in this case.
The package at stable branch (nixos-24.11) did not build. I managed to build the unstable branch. It took more than 2 hours building all the system images.
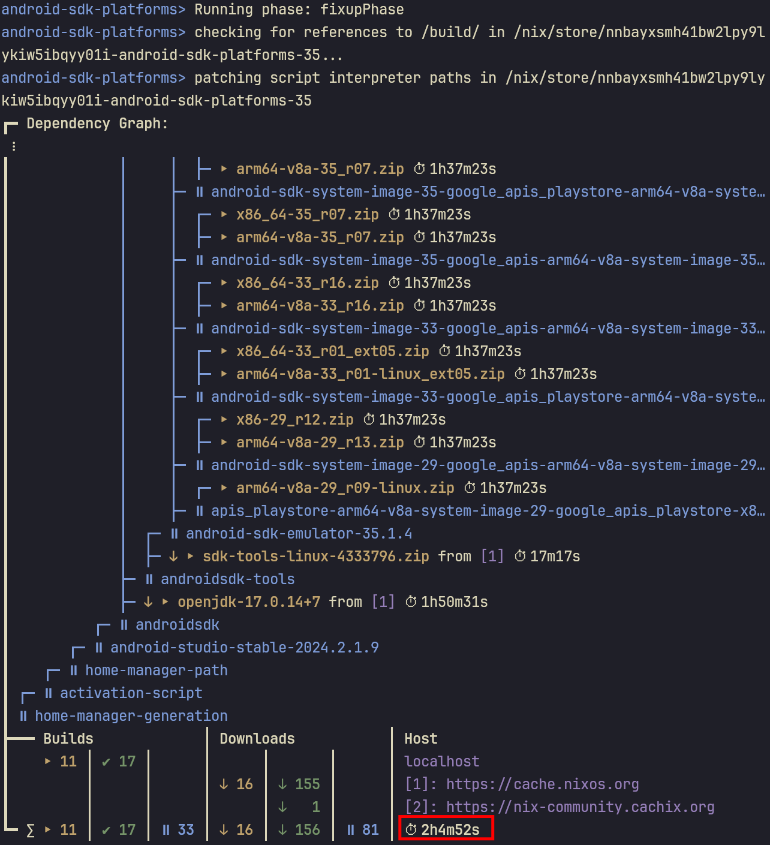
The fact that only unstable branch built means that I will have to frequently update and build it. Nope.
Regardless, I just wanted it to work. I launched Android Studio. The window showed up. Good sign. I clicked Create Virtual Device in Device Manager to create an emulator and … nothing happened. There is no log and I have no idea why it’s not working.
It was the closest that I got the emulator to work. The emulator launched but it’s just black screen after the initial load screen.
I installed the compiled Android Studio from AUR, but sadly the emulator didn’t work. I suspected it’s much more work to make KVM and Android emulators work inside another emulation (distrobox), so I didn’t persue this lead.
- Full-blown KVM
This should work. But it’s a pain to transfer files in and out of the VM. It feels clunky. I’d do this if the abaove method did not work and use this as a last resort.
Conclusion
Hopefully this post saves another poor soul just like manuelplavsic saved mine.