
The Good:
- Out of the box LSP support from vscode
- vscode plugins are available
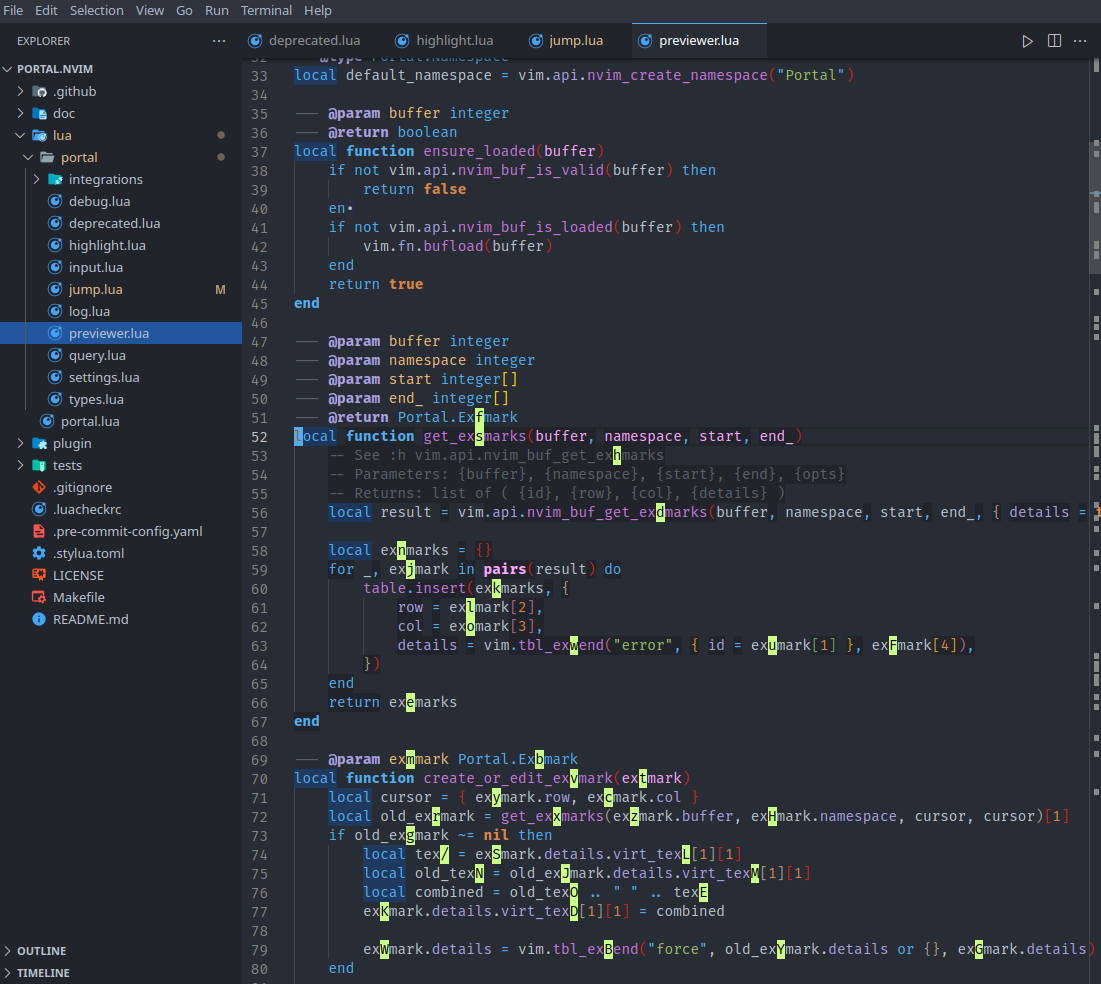
leap.nvim works in vscode-neovim:
The Bad:
- No
treesitter(e.g., text objects and incremental selection) - Any plugins requiring Neovim UI like
telescope,legendary,harpoonandportalwon’t work
Harder way: use neovide as our Neovim client. Compile treesitter parsers and telescope-fzf-native.nvim on an unrestricted Windows machine and then copy them to your work machine. LSP configuration is easier thanks to mason.nvim. I don’t recommend this approach unless you want the full Neovim experience.
The Good:
- Feels like home
The Bad:
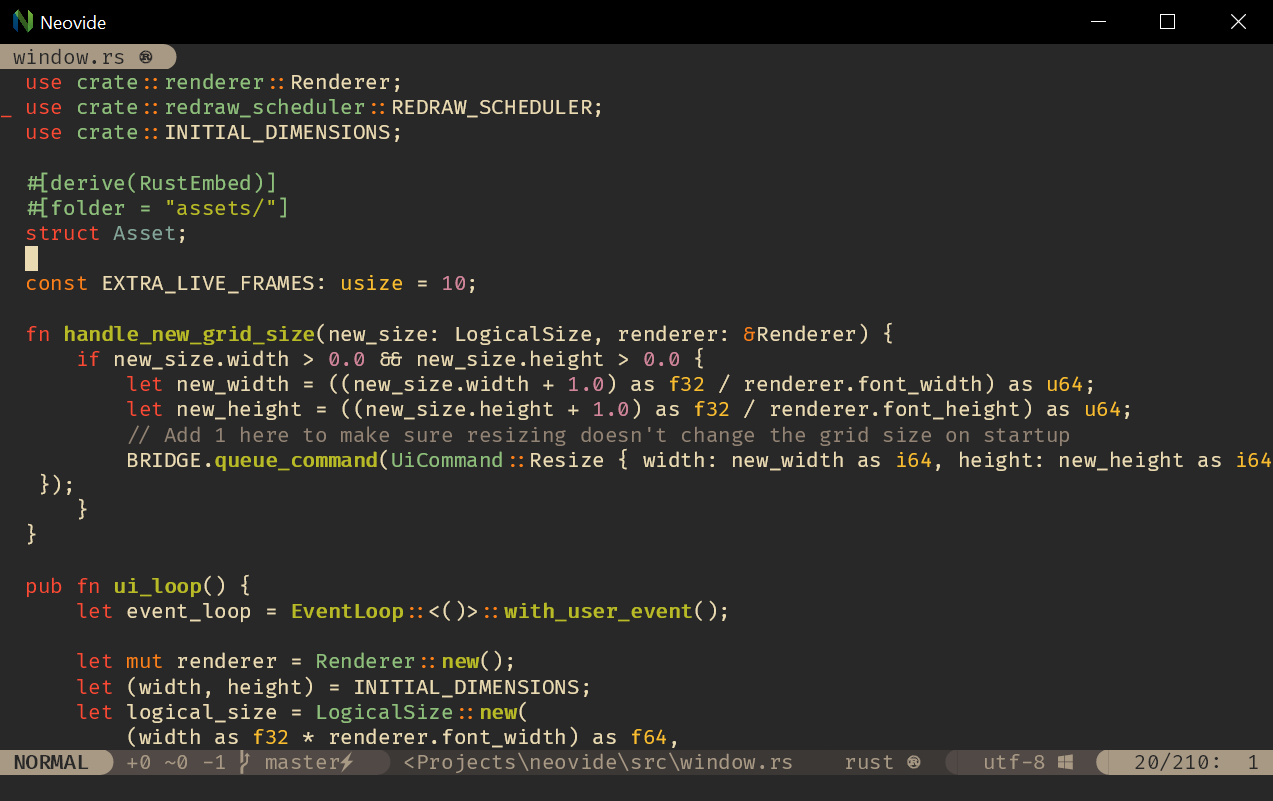
Neovide(below pic source) andneovim-qtwould freeze randomly (probably due to Windows and company’s spyware and bloatware)- Time-consuming to set up right due to the machine severely restricted and some Windows specifics like paths
Introduction
I recently got a software developer job at a corporate. Little did I know that I’d be assigned a no-admin-rights Windows machine. I won’t go about how ridiculous and suffocating it is to force a developer to write code on a restricted Windows machine without admin rights. This article aims to help my fellow Neovim users who are in my shoes. It can also serve as a guide to getting the most out of Neovim on Windows without using WSL2.
Pre-requisites
On your work machine, you need to be able to:
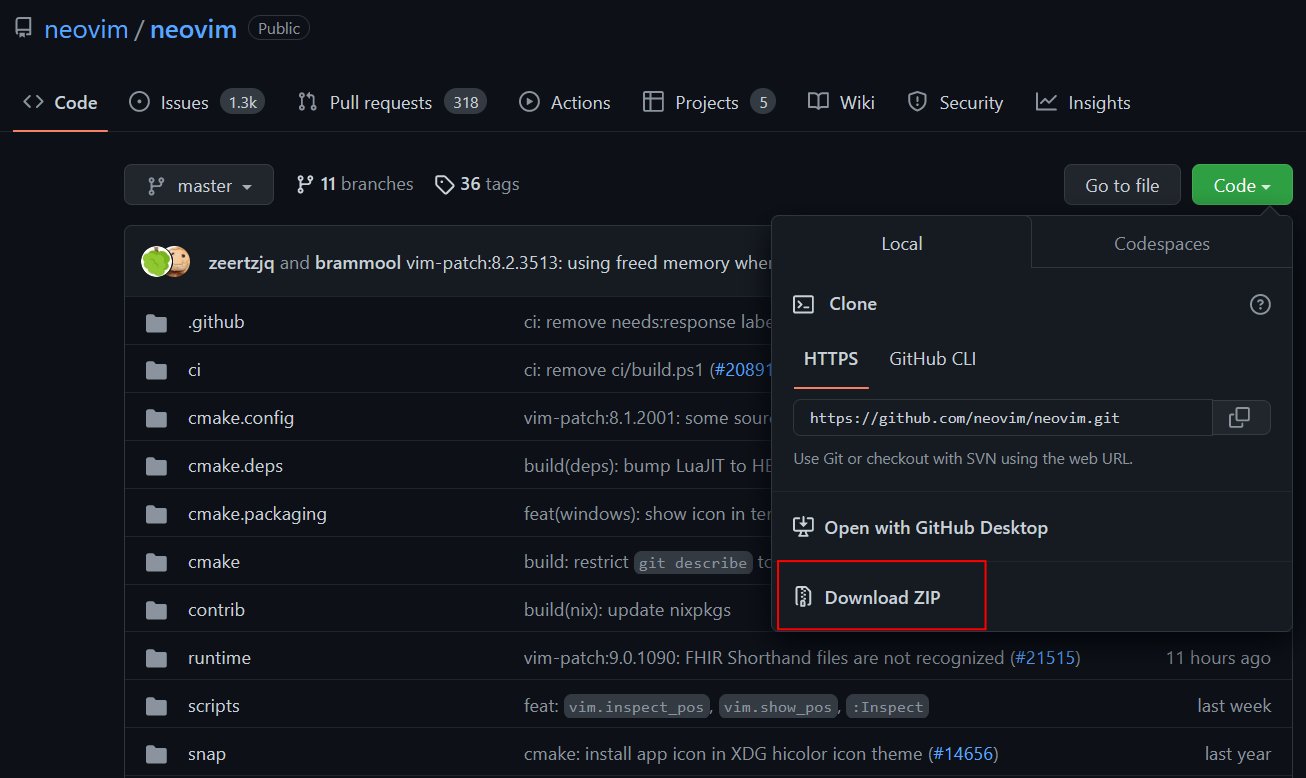
- Download Github repo as zip or else there’s no point continue reading:
Run
nvim-qt.exefromnvim-win64\bindownloaded from nvim-win64.zipUse vscode for vscode-neovim
Overview
The idea is that we use a private repo (let’s call it work repo) as a central hub where we sideload configs and exes into the work machine. On my personal Linux machine, I push everything I need to the work repo, then download it to my work machine.
Create a private repo from your Github (or Gitlab or BitBucket) account.
Add the following if you just want to use vscode-neovim:
- nvim-win64.zip
- sweet sweet neovim config of yours (my config if you’re interested)
If you want the full Neovim experience, also git add the following:
- Neovide for Windows’ Neovim client over
nvim-qt(my preference) - Compiled treesitter parsers and telescope-fzf-native.nvim for Windows (see below)
- Binary of ripgrep and fd
My Workflow
I use neovide to take notes with vimwiki for the full Neovim experience.
To write code, I use vscode-neovim. It offers the best of both worlds: out of box LSP support and most Neovim plugins work. Although we don’t have telescope, we can use vscode’s counterpart to make up for it (see below). It’s detrimental that Neovide or nvim-qt would hang randomly. vscode-neovim would hang sometimes too, but less and overall, I found vscode-neovim provides a better development experience.
I have a set of unified keybindings regardless whether I’m using vscode-neovim, neovide or nvim-qt.
init.lua:
nnoremap <silent> <C-g> <Cmd>call VSCodeCall('filesExplorer.findInFolder')<CR>
nnoremap <silent> <leader>fg <Cmd>call VSCodeCall('workbench.action.findInFiles')<CR>
nnoremap <silent> <leader>ff <Cmd>call VSCodeCall('actions.find')<CR>
legendary.lua:
{ "<C-g>", "<cmd>Telescope find_files<CR>", description = "Telescope: Find Files" },
{ "<leader>fg", "<cmd>Telescope live_grep<CR>", description = "Telescope: Find Text" },
{ "<leader>ff", "<cmd>Telescope current_buffer_fuzzy_find <CR>", description = "Telescope: Find Text in Current Buffer"}
Plugin Managers?
I’ve tested that both packer.nvim and vim-plug work on Windows 10 without requiring admin rights.
Don’t be fooled by packer’s Requirements:
For more please see: Installation of local plugins on Windows requires running with Admin privileges #679
Neovim configuration on Windows 10 is an excellent guide for a general overview.
Since I can’t git clone anything, I don’t use any plugin manager; I just install them manually (more on this below).
Setting up Neovim with Your Favorite Plugins
Unzip nvim-win64.zip into your work machine under
C:\Users\username\Documents\config\nvim-win64\(or whatever path you prefer and change it accordingly).Run
C:\Users\username\Documents\config\nvim-win64\bin\nvim-qt.exeto verify that it works. Two pathsC:\Users\username\AppData\Local\nvimandC:\Users\username\AppData\Local\nvim-datashould be created (if not, just create them).Download plugin sources from Github as zips and put them under
C:\Users\username\AppData\Local\nvim-data\site\pack\packer\start:
start
|   leap.nvim
|   flit.nvim
|   dressing.nvim
|   legendary.nvim
|   nvim-tree.lua
|   telescope.nvim
    ...
Directory Structures
C:\Users\username\AppData\Local\nvim:
nvim
|   ginit.vim
|   init.lua
|
+---lua
|   +---core
|   |       autocmds.lua
|   |       colors.lua
|   |       keymaps.lua
|   |       options.lua
|   |       workkeymaps.lua
|   |
|   +---lsp
|   |       cmp.lua
|   |       lspsaga.lua
|   |       lsp_config.lua
|   |       mason.lua
|   |       mason_lspconfig.lua
|   |
|   \---plugins
|           barbar.lua
|           diffview.lua
|           dressing.lua
|           grapple.lua
|           leap.lua
|           legendary.lua
|           lualine.lua
|           nvim-surround.lua
|           nvim-tree.lua
|           telescope.lua
|           treesitter.lua
|           ...
File Structures
This section explains the file structures under C:\Users\username\AppData\Local\nvim.
ginit.vim:
Guifont! JetBrainsMono Nerd Font:h8
GuiTabline 0
GuiPopupmenu 0
set mouse=
ginit.vim is for configuring nvim-qt. I don’t use nvim-qt but it’s nice to have as a backup.
init.lua:
Please see the inline comments.
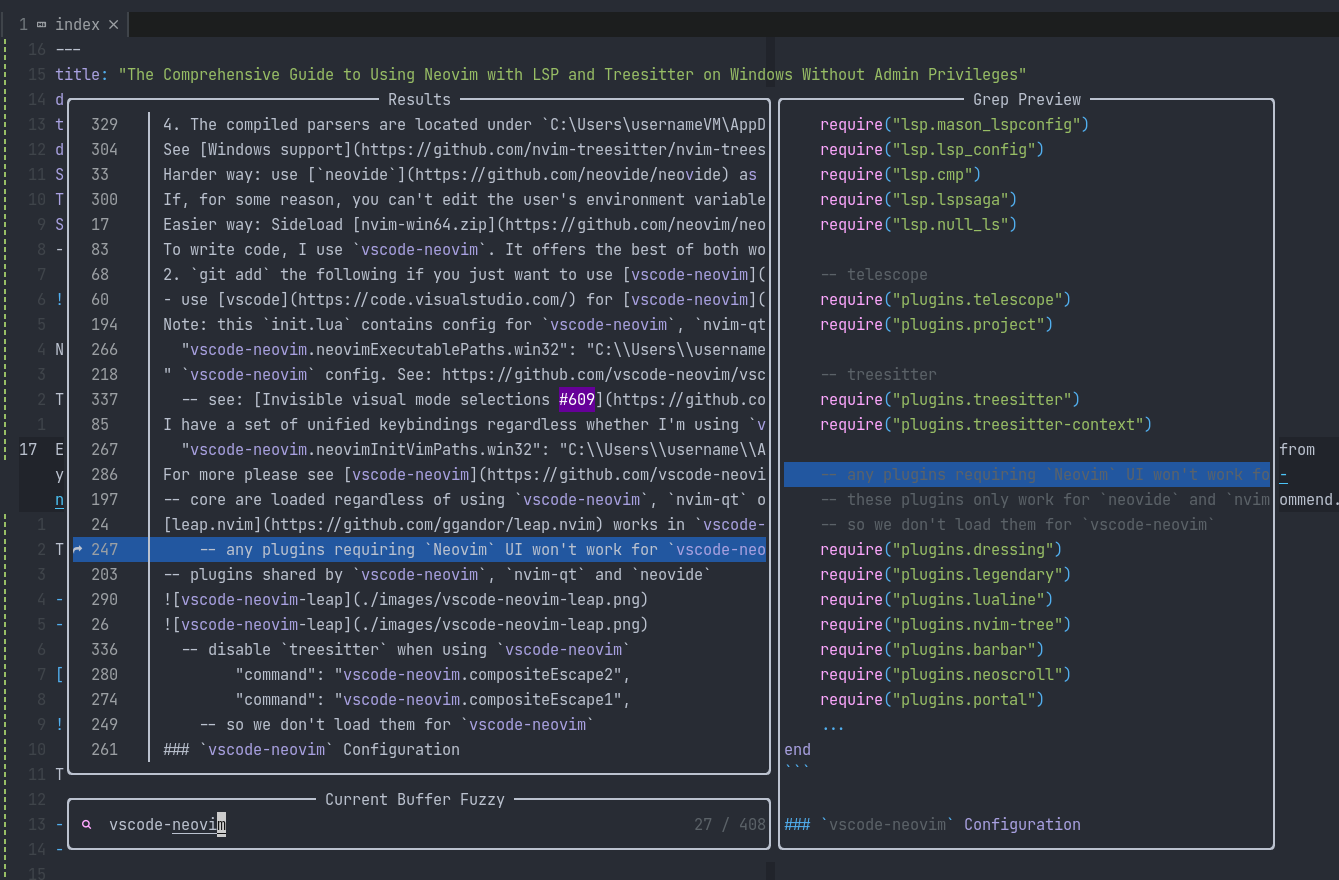
Note: this init.lua contains config for vscode-neovim, nvim-qt and neovide, Remove unnecessary parts as you see fit.
-- core are loaded regardless of using `vscode-neovim`, `nvim-qt` or `neovide`
require("core.options")
require("core.keymaps")
require("core.autocmds")
require("core.colors")

-- plugins shared by `vscode-neovim`, `nvim-qt` and `neovide`
require("plugins.leap")
require("plugins.flit")
require("plugins.nvim-surround")
require("plugins.Comment")
require("plugins.illuminate")

vim.cmd[[
" `neovide` config
if exists("g:neovide")
    set guifont=JetBrainsMono\ Nerd\ Font:h10
    let g:neovide_scale_factor=1.0
    let g:neovide_cursor_animation_length=0
endif

" `vscode-neovim` config. See: https://github.com/vscode-neovim/vscode-neovim#invoking-vscode-actions-from-neovim
if exists('g:vscode')
    nnoremap <silent> <C-g> <Cmd>call VSCodeCall('filesExplorer.findInFolder')<CR>
    nnoremap <silent> <leader>ff <Cmd>call VSCodeCall('actions.find')<CR>
    nnoremap <silent> <leader>fg <Cmd>call VSCodeCall('workbench.action.findInFiles')<CR>
    nnoremap <silent> <C-s> <Cmd>call VSCodeCall('workbench.action.files.save')<CR>
endif
]]

if vim.g.vscode then
    -- VSCode extension
else
    -- below for `neovide` and `nvim-qt`
    -- LSP
    require("lsp.mason")
    require("lsp.mason_lspconfig")
    require("lsp.lsp_config")
    require("lsp.cmp")
    require("lsp.lspsaga")
    require("lsp.null_ls")

    -- telescope
    require("plugins.telescope")
    require("plugins.project")

    -- treesitter
    require("plugins.treesitter")
    require("plugins.treesitter-context")

    -- any plugins requiring `Neovim` UI won't work for `vscode-neovim`
    -- these plugins only work for `neovide` and `nvim-qt`
    -- so we don't load them for `vscode-neovim`
    require("plugins.dressing")
    require("plugins.legendary")
    require("plugins.lualine")
    require("plugins.nvim-tree")
    require("plugins.barbar")
    require("plugins.neoscroll")
    require("plugins.portal")
    ...
end
vscode-neovim Configuration
Go to your vscode’s settings.json and add the following:
"vscode-neovim.neovimExecutablePaths.win32": "C:\\Users\\username\\Documents\\config\\nvim-win64\\bin\\nvim.exe",
"vscode-neovim.neovimInitVimPaths.win32": "C:\\Users\\username\\AppData\\Local\\nvim\\init.lua"
If you want to escape to Normal mode with jk, go to vscode’s keybindings.json and add the following:
{
    "command": "vscode-neovim.compositeEscape1",
    "key": "j",
    "when": "neovim.mode == insert && editorTextFocus",
    "args": "j"
},
{
    "command": "vscode-neovim.compositeEscape2",
    "key": "k",
    "when": "neovim.mode == insert && editorTextFocus",
    "args": "k"
}
For more please see vscode-neovim.
Open vscode and see if Neovim inside vscode works (below showing leap.nvim works, which was just recently supported thanks to #804):
If you’re satisfied with the experience, thank you for reading! If not, please continue for the full Neovim experience.
Full Neovim Experience: Neovide with Treesitter and LSP
Neovide Configuration
For all binary and executables such as neovide, ripgrep, fd, we need to add them to the user’s environment variables. To test it works, open cmd and type out neovide to see if it’s recognized.
If, for some reason, you can’t edit the user’s environment variables, try manually pointing neovide to neovim-bin like C:\Users\username\Documents\config\neovide.exe --neovim-bin C:\Users\username\Documents\config\nvim-win64\bin\nvim.exe. Reference: Neovim Binary
Treesitter Configuration
See Windows support. Sadly, pre-compiled parsers are disabled at the moment, so we’ll have to compile the parsers ourselves. I used llvm-clang. Feel free to pick any compilation method you see fit. The rub is that I can’t use chocolatey on my work machine. So on my Linux box, I have a Virtual Machine (VM) with Windows 10 installed to compile the parsers. Under the VM:
- Install
chocolatey - Open an admin powershell:
choco install git
choco install neovim
choco install llvm
- With the following
treesitter.luaon our VM:
require("nvim-treesitter.install").compilers = { "clang" }
-- else I get error. See https://github.com/nvim-treesitter/nvim-treesitter/issues/3232
require("nvim-treesitter.install").prefer_git = true
require("nvim-treesitter.configs").setup({
  ensure_installed = "all",
  sync_install = true
})
Open Neovim and :TSUpdate all to install all parsers.
The compiled parsers are located under
C:\Users\usernameVM\AppData\Local\nvim-data\site\pack\packer\start\nvim-treesitter\parser. Zip them and push to your work repo. Unzip and sideload them toC:\Users\usernameWork\AppData\Local\nvim-data\site\pack\packer\start\nvim-treesitter\parser. (Reference: parser install directory)Set the following
treesitter.luaon the work’s machine:
require("nvim-treesitter.configs").setup({
  highlight = {
  -- disable `treesitter` when using `vscode-neovim`
  -- see: [Invisible visual mode selections #609](https://github.com/vscode-neovim/vscode-neovim/issues/609)
    enable = (not vim.g.vscode),
  },
    })
- Go to any file that supports
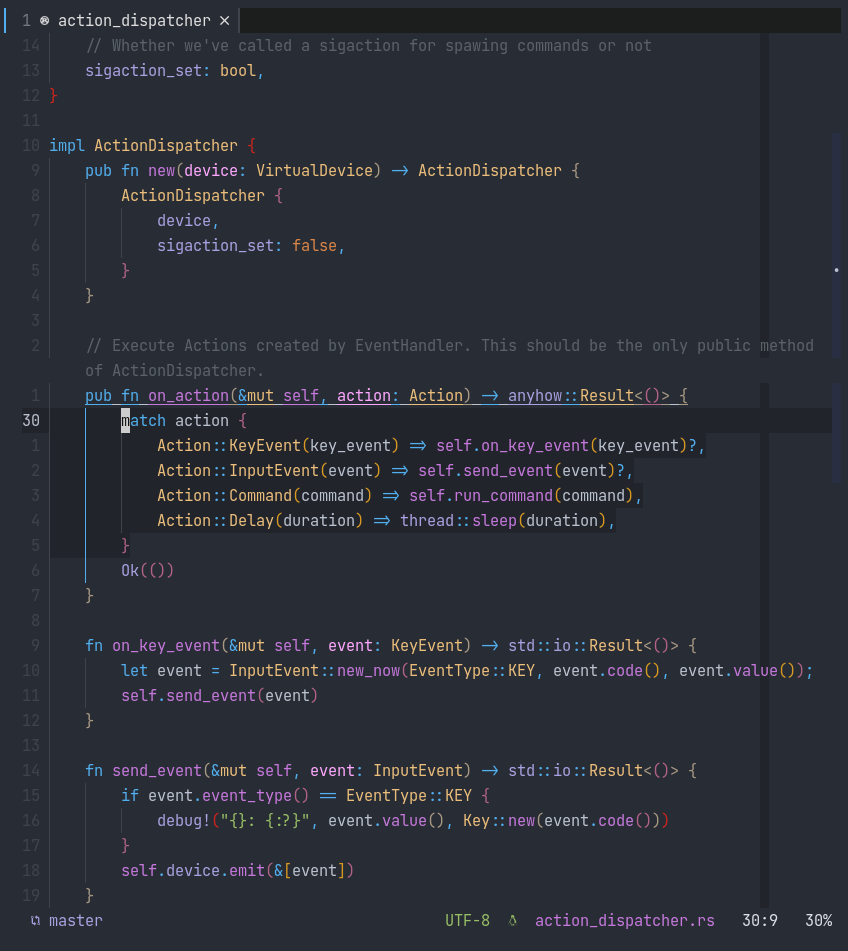
treesitterand verify if sweet sweet syntax highlighting is working:
I tried directly copying ~/.local/share/nvim/site/pack/packer/start/nvim-treesitter/parser to C:\Users\username\AppData\Local\nvim-data\site\pack\packer\start\nvim-treesitter\parser. It doesn’t work because parsers are platform-specific. You need to compile them for the right platform.
Also, I’ve found that treesitter is vital to Neovim’s UI performance. Without treesitter installed, any popup window takes a long time to execute. Launching telescope takes literally two seconds and portal.nvim’s window five seconds. No exaggeration.
A lot of work just for treesitter parsers I know.
LSP Configuration
If LSP works in vscode, LSP in Neovim should also work, because afaik, they both connect to the same servers.
Again, I tried zipping the whole mason directory under ~/.local/share/nvim/mason to C:\Users\username\AppData\Local\nvim-data\mason. It doesn’t work because mason downloads platform-specific language servers. In other words, on Linux, you only see bash-language-server (executable binary), but on Windows, it’s bash-language-server.cmd.
I simply :Mason and install the language servers I need. Not everything in mason works, however:
lua-language-server
...acker\start\mason.nvim/lua/mason-core/installer/init.lua:121:
...start\mason.nvim/lua/mason-core/managers/github/init.lua:55:
Failed to fetch latest release from GitHub API.
Because mason tries to connect to GitHub API, which is blocked on my restricted corporate machine. We have to again, resort to downloading it from an unrestricted Windows machine and then copy it to our work machine, similar to sideloading treesitter parsers mentioned above.
Telescope Configuration
For the best experience, I recommend installing ripgrep, fd and telescope-fzf-native.nvim.
ripgrep and fd
- Download the Windows binary ripgrep and fd
- Add their paths to the user’s environment variables
- Modify as follows in
telescope.lua:
require("telescope").setup({
  defaults = {
  -- need `rg.exe` instead of `rg`
    find_command = { "rg.exe", "--hidden", "--ignore-case" }
  },
})
telescope-fzf-native.nvim
- On a Windows machine:
choco install cmake - Compile
telescope-fzf-nativewithuse {'nvim-telescope/telescope-fzf-native.nvim', run = 'make' } - Copy the whole
telescope-fzf-native.nvimto your work machine - Add the follows in
telescope.lua:
require('telescope').load_extension('fzf')
Conclusion
The development experience on a free and unrestricted Linux machine is unparalleled. Being forced to go back to Windows and gasp — a no-admin-rights Windows machine nonetheless makes me appreciate free and open-source OS and Linux so much more.
Given LSP and treesitter support for Neovim was only available since 0.5 (July, 2021), I’m sure not a lot of developers trying to use Neovim in a corporate environment. Hopefully this guide is helpful if you’re in similar shoes. If you have other tricks and tips to enhance the Neovim experience on Windows, please don’t hesitate to leave a comment below or contact me at email kohane27 at protonmail dot com . I’d update this guide.
Thank you for reading!
:wq